Houndoom
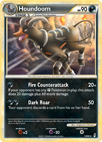
Turn weakness into strength with Houndoom
(10/95)! The Dark-type Houndoom has a Weakness to Fighting-type
Pokémon, but that shouldn’t slow you down too much. Fight back with Fire
Counterattack, which does 20 damage but 60 more damage if your opponent
has a Fighting-type Pokémon anywhere in play! Better still, this attack
costs only 1 Darkness Energy to use. If you want to keep things simple,
switch to Dark Roar, a 50-damage attack that also forces your opponent
to discard a card of his or her choice from his or her hand. With two
powerful attacks and a reasonable 90 HP, Houndoom won’t have a hard time
finding a home in your deck!
Lucario
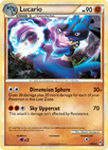
An impressive number of cards from the Pokémon TCG: HS—Triumphant expansion dealt with the Lost Zone, and Lucario (14/95) keeps the ball rolling in the Call of Legends
expansion! If you find that a surprising number of your Pokémon are
entering the Lost Zone, take advantage of that by using Lucario’s
Dimension Sphere attack—it does 30 damage,plus 20 more damage for each
of your Pokémon that has been put in the Lost Zone, and all for only 2
Colorless Energy! Lucario makes a perfect partner for Absol Prime (HS—Triumphant, 91/102) or Mew Prime (HS—Triumphant,
97/102). If you want to try another tactic with your deck, Lucario can
do a hefty 70 damage to your opponent with its Sky Uppercut attack.
Additionally, this attack will ignore the Resistance of the Defending
Pokémon! Lost Zone or not, Lucario is a force to be reckoned with.
Pachirisu
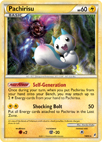
Looking to get off to a quick start? Energize your deck with Pachirisu
(18/95), a diminutive Pokémon with shocking potential! During your
turn, when Pachirisu is placed onto your Bench, you can attach two
Lightning Energy from your hand to Pachirisu using its Self-Generation
Poké-Power. Conveniently, two Lightning Energy is also the cost of
Pachirisu’s Shocking Bolt attack—an attack that zaps the Defending
Pokémon for 50 damage! The downside is that Shocking Bolt requires you
to put all the Energy attached to Pachirisu into the Lost Zone. Still,
in one turn you can play Pachirisu, make it your Active Pokémon, and hit
for 50 damage! It’s a lightning-fast way to put your opponent on the
ropes early on.
Snorlax
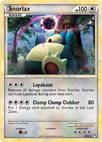
Go big with the massive Snorlax
(33/95), a Basic Pokémon that boasts an impressive 100 HP. With that
kind of stamina, Snorlax is in for the long haul. But Snorlax’s
defensive prowess doesn’t stop there—its Layabout attack lets you take
all the damage counters off of Snorlax, letting it stay in battle all
the longer. Snorlax isn’t just about defense, however. Use its awesomely
named Clomp Clomp Clobber attack to hit your opponent’s Defending
Pokémon for 80 damage. The downside of Clomp Clomp Clobber is that you
have to put an Energy card attached to Snorlax into the Lost Zone.
Still, with impressive HP, superb healing power, and a powerful attack,
Snorlax is ready to throw its weight around in your deck!
Tangrowth
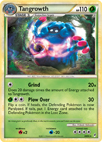
No opponent is beyond reach when Tangrowth
(34/95) gets in on the action. This Stage 1 Pokémon features an attack
of almost limitless possibility: its Grind attack does 20 damage for
every Energy attached to Tangrowth, regardless of the Energy type. Double Colorless Energy (HeartGold & SoulSilver,
103/123) is definitely added value to any deck with Tangrowth in
it—with only two Double Colorless Energy attached to it, Tangrowth is
suddenly hitting for 80 damage! To create a little extra havoc, use
Tangrowth’s Plow Over attack to deliver 30 damage, and either Paralyze
the Defending Pokémon or force it to send one of its attached Energy
cards to the Lost Zone, depending on a coin flip. No matter what you do,
your opponent is going to face some serious trouble when Tangrowth is
on your side.
Zangoose
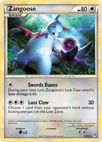
If you're looking for ways to pad out your Lost Zone-themed deck, look no further than Zangoose
(39/95)! With plenty of HP, and attacks that have only Colorless Energy
costs, it's easy to find a home for this Basic Pokémon. Zangoose’s most
notable feature is its Lost Claw attack, which does 30 damage and lets
you choose one of your opponent's cards (without looking) and send it
straight to the Lost Zone! You can also use the Swords Dance attack to
power up Lost Claw—using it will cause Lost Claw to double its impact
and do 60 damage on your next turn. Whether you're setting up your Mew
Prime or just disrupting your opponent's plans, let the powerful
Zangoose lead the way!
Seviper
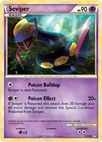
Rarely do you see a card with an attack that has no positive effects and only negative ones, but Seviper
(51/95) is no ordinary card! For 1 Energy, Seviper can use its Poison
Buildup attack to make Seviper Poisoned... and that’s all it does. Seems
pretty negative, right? The payoff comes with Seviper’s Poison Effect
attack, which normally does a mere 20 damage. However, if Seviper is
Poisoned, Poison Effect does 60 more damage and Seviper is no
longer Poisoned! The brief time that Seviper is Poisoned pays off big
with an 80 damage attack, a potent blow from a Basic Pokémon. Don’t be
too concerned about frequently making Seviper Poisoned—its 90 HP should
help it resist this self-inflicted Special Condition.
Lost World
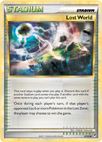
There has been a lot of talk about the Lost Zone and how it can
influence the Pokémon Trading Card Game—and that debate is set to
reignite with the ,a
href="/us/trading-cards/database/col-series/col1/81/" title="Lost
World">Lost World Stadium card (81/95)! When the Lost World card is
in play, if either player has six or more Pokémon in the Lost Zone, his
or her opponent can choose to win the game! The Lost World significantly
affects prominent cards such as Gengar Prime (HS—Triumphant, 94/102) and Mew Prime (HS—Triumphant,
97/102), as well as all the many other cards that deal with the Lost
Zone. But, as with all Stadium cards, the Lost World affects both
players equally—it would be hasty to believe that it will rack up easy
wins against some competitors! However, one thing is certain: we'll be
seeing a lot of the Lost World at all levels of Pokémon TCG play, from
local league nights to major competitions!
Shiny Ho-Oh
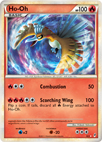
For the first time in the Pokémon TCG, you can get hold of a Shiny Ho-Oh
(SL5)! With 100 HP and two fearsome attacks, Shiny Ho-Oh is an
outstanding Basic Pokémon. Let Shiny Ho-Oh torch the Defending Pokémon
for 100 damage with Scorching Wing, one of the most powerful attacks
you’ll see coming from a Basic Pokémon. The Energy requirements are
steep—3 Fire Energy and 2 Colorless Energy (and a coin flip will tell
you if you have to discard all the attached Fire Energy)—but the Knock
Out power of Scorching Wing is worth the effort. If you’re looking for
something more lightweight but still very impressive, use Shiny Ho-Oh’s
Combustion attack. The Combustion attack does only 50 damage but
requires only 1 Fire Energy and 2 Colorless Energy to use. Also, there’s
no risk of having to discard Energy from Shiny Ho-Oh for this one.
Regardless of its attacks, Shiny Ho-Oh’s incredible artwork and unique
place in the Pokémon TCG make this card a must-have!
Shiny Lugia
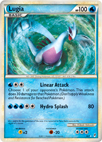
Cool down your opponents with the stunning Shiny Lugia
(SL7), the first Shiny Lugia to be found in a Pokémon TCG expansion! No
Pokémon is safe when Shiny Lugia is in play—it can hit any of your
opponent’s Pokémon in play for 30 damage with its far-reaching Linear
Attack. Then, load up more Energy and unleash the Hydro Splash attack on
the Defending Pokémon. For 3 Water Energy and 2 Colorless Energy, you
can do 80 damage and take out the Defending Pokémon... Not bad for a
Basic Pokémon! Regardless of your strategy, when your opponent sees the
awesome image of Shiny Lugia rising from the briny depths, you’re
guaranteed to take the upper hand!
